CHAI Community User Guide
Welcome to CHAI Community's user guide.
Click on the highlighted areas over the screenshot below to find out how they are used, otherwise, you can jump straight to finding out how to get started.
Welcome to CHAI Community's user guide.
Click on the highlighted areas over the screenshot below to find out how they are used, otherwise, you can jump straight to finding out how to get started.
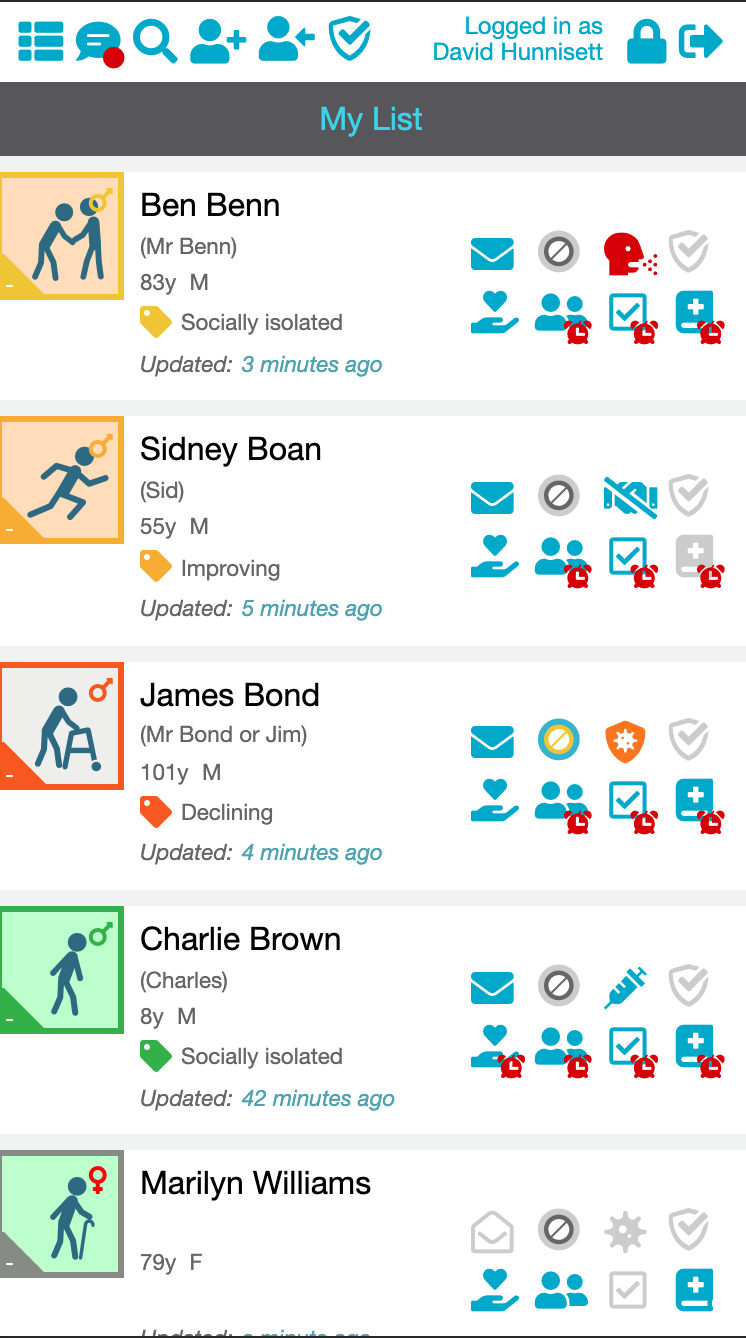
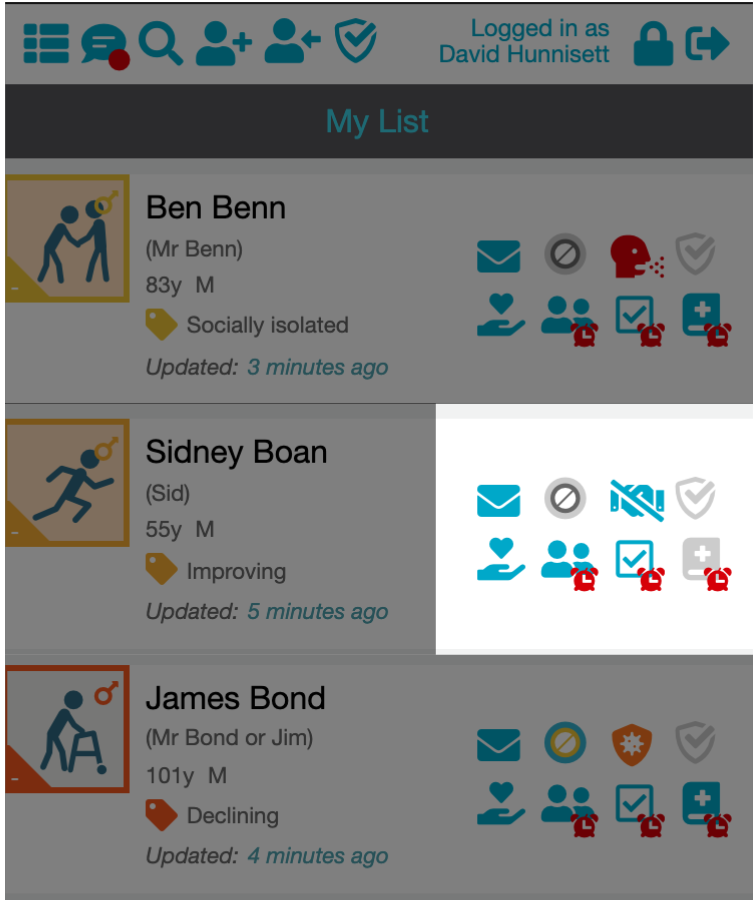
The first page you reach after logging into CHAI is "My List" of people that you will be helping.
You can always return to this page by tapping on the list icon at the very top left of the screen, inside the header.
If the individual you're looking for is not in your list see your group manager or your team manager.
Tap on an individual to open up their Summary Page, click here to jump to the Summary Page.
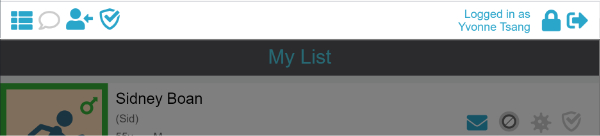
The white bar across the top of the screen and its icons are referred to as the app's Header.
The icons here are global navigation buttons that persist across all pages.
These links include:
My List - Return to your list of people
Group Chat - The group messaging feature
Add/Import Person - Which one is displayed depends on your user type.
Batch-Countersigning - This feature allows full users to countersign entries completed by trainees. Depending on your version of CHAI, this feature may be disabled.
Account & Password Management
Log Out
Each person assigned to your team will be represented by a banner in your list, it provides a condensed view of their personal details and the status of their tasks.
Tapping anywhere on their banner will take you to the person's Summary Page.
On the far left, you will see their Personal Icon, a stick-figure that reflects their frailty score that was assessed in the personal information form. The border indicates the most recent wellbeing score, see below for a more detailed break-down.
The textual information gives you:
Their Name
(Their Preferred Name)
Age and Gender
Wellbeing Status, with colour tag to match the Personal Icon border
The last time their information was updated
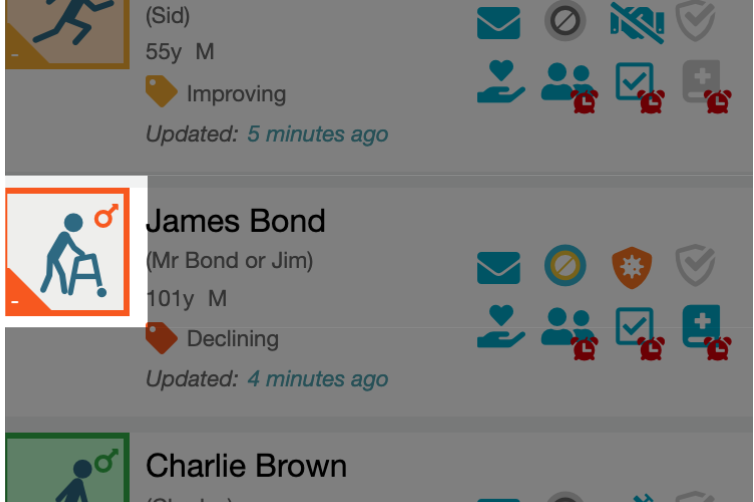
The stick person represents the individual's frailty as assessed in the personal details. There is a different stick person for each of the frailty scores.
The individual’s sex is represented by the female or male symbol.
The Personal Icon border changes colour based on the general wellbeing assessment. Tapping on the Personal Icon will always return you to the individual's dashboard.
To see the full description of what each icon in the Frailty Scale means, click here.
 1. Very Fit
 2. Well
 3. Managing Well
 4. Vulnerable
 5. Mildly Frail
 6. Moderately Frail
 7. Severely Frail
 8. Very Severely Frail
 9. Terminally Ill
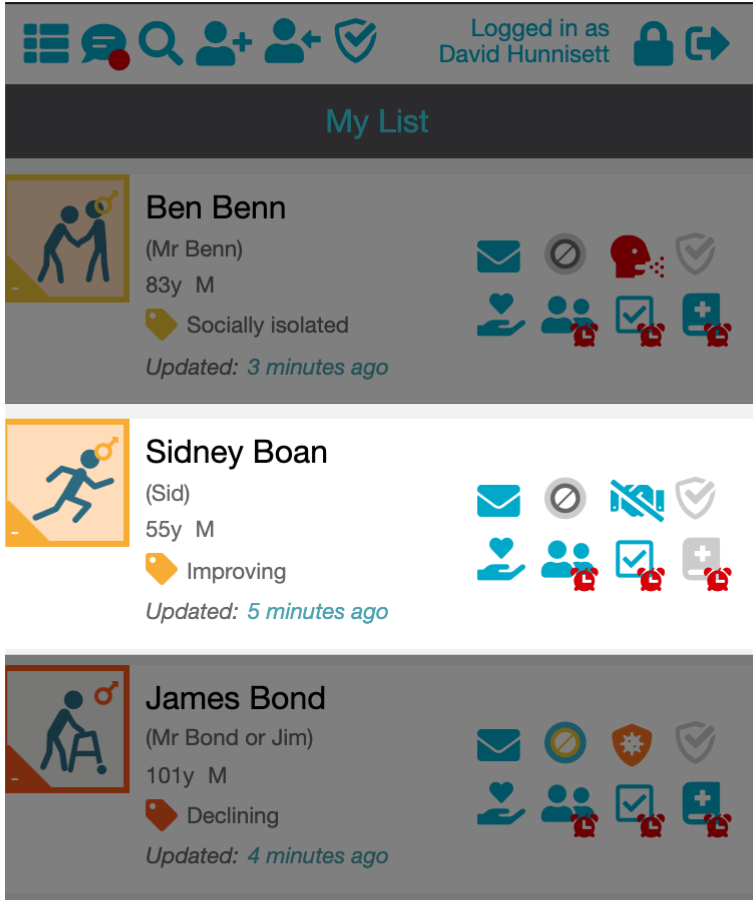
The coloured border around the Personal Icon indicates the person's wellbeing status that was last entered. This uses a traffic-light colour scheme to indicate at-a-glance how they're doing, where pale green is the most positive state, and a dark red border is reserved for the most serious concern.
In addition to the coloured border, their wellbeing is also indicated in the text that is displayed alongside the matching tag in the banner.
1. No obvious concern Physically & mentally okay.
2. No obvious concern but socially isolated Signpost local support.
3. Becoming a concern Advise individual to seek professional help.
4. A concern but improving Possibly as a result of professional help.
5. A concern & declining Ask if professional help is being provided.
6. Professional help needed Ensure professional services engaged.
These are visual warnings for tasks that need to be completed.
In general, they are grey if they are up to date and don't need attention. They will turn blue if they contain tasks that are due at some point and requires attention.
An orange bell attached to a status icon indicates that one of these forms is nearly due.
A red alarm clock attached to a status icon indicates that one of these forms is overdue.
From the full list, tapping on these will just take you to the person's Summary page, but if you are using a page associated with a specific person, tapping on one of these will take you directly to the relevant form.
The statuses included are:
Active Icons
Unread Notes Shortcut
 Person with Allergies Shortcut
Countersigning
Wellbeing Log
Daily Assistance
Tasks Due
Active Health Diary
Inactive Icons - Icons become greyed out when forms are up to date and don't require attention. Clicking on them still takes you through to the relevant form.
Read Notes Shortcut
 No Allergies Shortcut
No Countersigning
Wellbeing Log is up to date
Daily Assistance is up to date
No Tasks Due
Active Health Diary is Current
Visit the Shortcuts & Status section of the Icons page to see the full details about what each icon indicates.
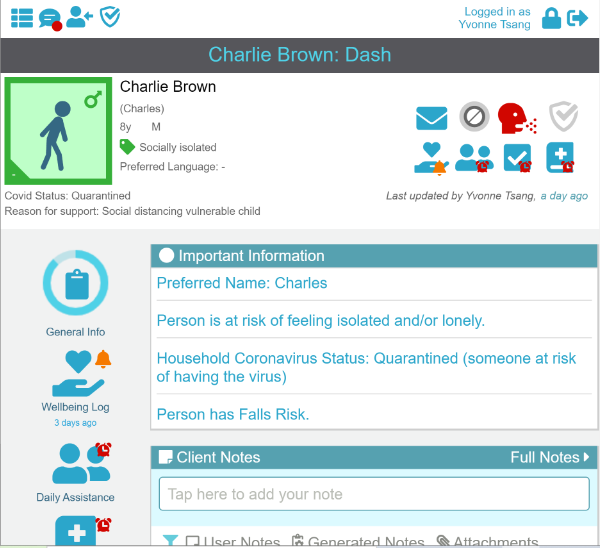
You can think of the Summary page as a person’s home page, it can be reached by pressing the person’s Personal Icon in the banner.
You can always return to the Summary page at any time by tapping on the Personal Icon.
See the " what does a Personal Icon mean?" section to understand more.
All items on the Summary Page are interactive, such as the Banner that appears accross the top.
The Summary page contains the following:
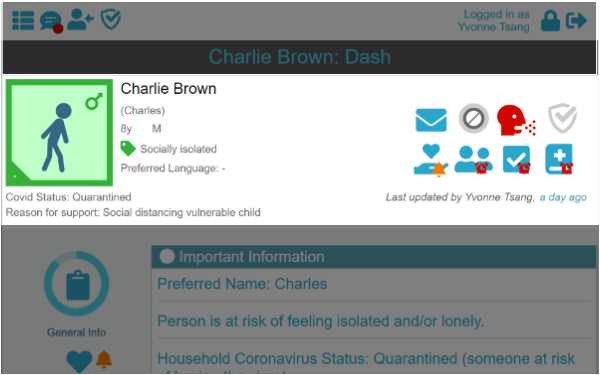
Each person will have a handy Banner that appears across the top of all of their pages. It's a lot like the Banner shown in My List, but it has a number of enhanced features.
It provides a condensed view of person's details and the status of their tasks as well as shortcuts that can take you directly to relevant pages.
On the far left, you will see their Personal Icon.
The textual information gives you:
Their Name
(Their Preferred Name)
Age and Gender
Wellbeing Status, with colour tag to match the Personal Icon border
Preferred Language
The reason why they are in need of support
The last time their information was updated, and who made those changes
On the right, is the block of Status Icons, which also act as quick shortcuts to the relevant pages when you tap on them.
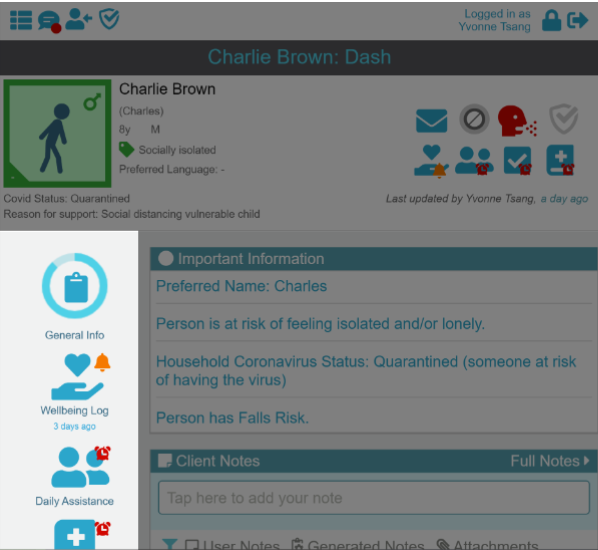
The side menu contains Icons and associated descriptions. Many of them are also in the Shortcut Icons in the Banner. It is simply down to personal preference which icons you use to get to the same place.
An orange bell attached to a menu item indicates that one of these forms is nearly due.
A red alarm clock attached to a menu item indicates that one of these forms is overdue.
See the menu section of the icon page for full details about what these icons mean.
General Info
Wellbeing Log
Daily Assistance
Health Diary
Forms & PDFs
Concern or Help
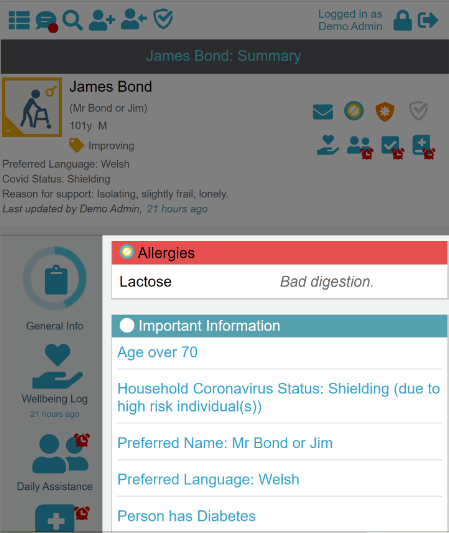
Provides an overview of key information including allergies and medical conditions (essential to know before food shopping).
Clicking any of the individual items in the list of Important Information will take you to the original Form where the data can be amended if necessary.
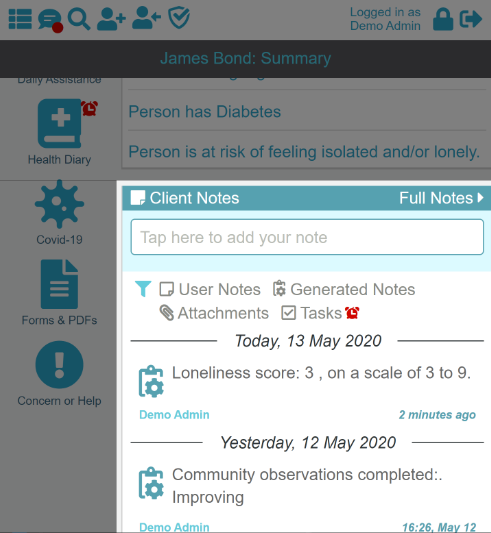
You can enter client notes, attach files, photos, record audio or set tasks. Some notes / tasks are generated by the system automatically.
You can filter the notes by task or simply tap on the Task icon in the Banner to see all open Tasks.
It is good practice to make regular notes about a person, especially if raising concern or noting consent.
Note: Remember they can be seen by all of your colleagues in your team and your name will be logged with the note or task.
If you have a general message for your team, rather than a note about a specific individual, then use the Group Chat at the top of every page.
Whilst you're on the Person's Summary Page look at their Side Menu, there is a link to General Information, tap on it to be taken to a set of forms that contains all of the background information about an individual person.
It is used to automatically prompt for things like pet care and health diaries. After completing this during your first contact, try and fill in as much of it as you and the individual feel comfortable with.
Important information can be recorded that will aid the support group over the short and long term.
Full step-by-step instructions for adding a person's details:
Each time you visit or call a person that you're helping, you can record your interaction with them in the Wellbeing Log, where you can save information such as their general wellbeing, their nutrition, Covid-19 symptoms and more.
The quickest way to reach it is to click on the Wellbeing Log icon in that person's banner, alternatively, you can find it alongside the other forms in the Daily Assistance.
Full step-by-step details about recording your visit: